Atlanta Food and Wine

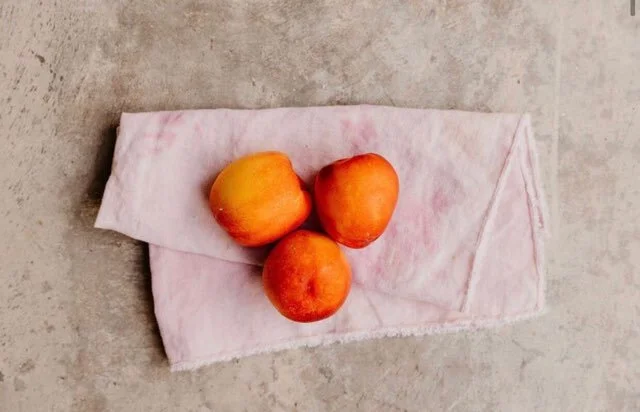
Atlanta Food and Wine was a huge success. Thank you Visit Mississippi and Visit Hattiesburg for choosing me to represent the pineblet! I hope you each enjoy this gluten free pie recipe! I modified the recipe and made mini pies for the festival and I also added strawberry syrup instead of maple syrup. I cooked down strawberries and then pureed to keep the sugar as low as possible.

Perfect Gluten-Free Vegan Cherry Apple Pie

Prep Time 15

minutes

Cook Time 40

minutes

Servings 12

Ingredients

Filling

• 5 cups frozen unsweetened tart cherries

• 1 large apple or two medium apples

• 1 cup pure maple syrup

• ½ cup Bob's Red Mill 1:1 Gluten-Free Flour*

• 1 teaspoon ground cinnamon

Crust

• 2 cups Bob's Red Mill 1:1 Gluten-Free Flour

• 1 teaspoon Himalayan Sea Salt*

• 1 teaspoon xanthan gum

• ⅔ cups virgin, unrefined coconut oil

• 8-10 tablespoon cold water

Instructions

• Preheat oven 425º F


Filling

• Thaw and drain frozen cherries (I microwave for 8 minutes at 40% power, stirring every 2 minutes) - then add to medium-sized mixing bowl


• Peel and core apple(s) and chop into 1-inch pieces


• Add chopped apples, 1 cup maple syrup, ½ cup flour, and 1 teaspoon cinnamon to cherries


• Stir until flour is mixed in and then set aside


Crust

• Combine 2 cups of flour, 1 teaspoon salt, and 1 teaspoon xanthan gum in a large mixing bowl


• Add ⅔ cups coconut oil and use a pastry cutter to combine until mixture begins to clump into particles the size of small peas**


• Sprinkle mixture with 4 tablespoon of cold water, mix with pastry cutter, then add another 4 tablespoon and continue to mix until all flour is moistened and forms large clumps that almost clean the sides of the bowl (add an additional 1-2 tablespoon of cold water if necessary)


• Use your hands to kneed pastry into a ball


• Use a knife to slice pastry ball in two - making one side slightly larger than the other


• Place a large sheet of waxed paper on a damp counter (the damp counter will keep the paper from sliding)


• Use your hands to flatten the larger-sized pastry into a thick round - pushing in the sides to seal cracks


• Place flattened pastry in the center of the waxed paper and cover with another sheet of paper


• Use a rolling pin with light pressure to roll out the pastry until it's about 2-inches larger than an inverted pie plate and about ⅛-inch thick


• Peel top sheet of waxed paper off the pastry, then use the bottom sheet of waxed paper to lift the pastry and place it in the pie plate - then carefully peel the bottom sheet of waxed paper off the pastry (peel slowly - the pastry is delicate)


• Carefully lift edges of the pastry as necessary to push it down into the pie plate and use your knuckle to press the pastry into the shape of the plate - use scraps from the edges to seal any tears


• Repeat steps 7-9 to roll out the smaller pastry until it's slightly larger than the pie plate


• Remove the top sheet of waxed paper and use a small cookie cutter to remove the center of the pastry (have fun with the shape!)


• Pour filling into the pastry-lined pie plate and use a spoon to level the chunks of fruit


• Carefully lift the bottom sheet of waxed paper with the top layer of pastry and hold it vertical to line up the bottom edge of the pastry with the rim of the pie plate - then quickly place the top layer of pastry over the filling


• Carefully peel the waxed paper off the pastry and gently lift the edges of the pastry to tuck in slightly along the edge of the pie plate


• Use a knife to trim excess pastry along the edge of the pie plate - then press with a fork to seal the top layer of pastry with the bottom layer


• Cup your hands along the out edge of the pie plate to ensure the seal


Bake

• Cover crust with a pie shield (or aluminum foil) and bake at 425ºF for 40 minutes (remove pie shield for last 15 minutes of baking) or until crust is lightly golden and juices begin to bubble in cut-out


• Allow to cool before serving

Read More
Katie Dixon
FOOD & FITNESS Friday: Kettlebell Swing

All the Epic Benefits You Get from Doing the Kettlebell Swing

It's the sneakiest total-body strength and cardio exercise ever. Once you get hooked, you're going to be loyal to it for life. The kettlebell swing is the most widely known kettlebell movement because of its versatility and ability to quickly get the heart rate up. It's an incredible total-body movement that builds strength while also requiring power, speed, and balance.

Kettlebell Swing Benefits and Variations

The swing mainly targets the muscles of the core, including your hips, glutes, and hamstrings, and the upper body, including your shoulders and lats.

While the specific muscle benefits are clutch, the best part is that this movement translates to a more fit and powerful body overall. A 2012 study published in the Journal of Strength and Conditioning Research found that kettlebell swing training increased both maximum and explosive strength in athletes, while a study conducted by the American Council on Exercise found that kettlebell training (in general) can increase aerobic capacity, improve dynamic balance, and dramatically increase core strength. (Yes, that's right: You can totally get a cardio workout with just kettlebells.)

Ready to get swinging? While most strength training guidelines say, "start light, then progress," this is one instance where starting too light can actually backfire: Most people actually start with too light of a weight, and therefore use their arms to muscle up the movement. If you're new to kettlebell training, try a 12 to 15 pound kettlebell to start. If you have experience with strength training or kettlebells, try a 25 pound.

If you don't feel ready for a full swing, simply practice "hiking" the kettlebell back up behind you and then placing it back on the floor. Once you feel comfortable with that, try opening at the hips quickly to power the swing with the hips, and then hike the kettlebell back underneath you and place it on the floor. . Practice pausing in between each swing (resting the kettlebell on the floor) before stringing them together.

Once you've mastered the basic swing, try a one-handed swing: Follow the same steps as with the traditional kettlebell swing, except only grab the handle with one hand and use one arm to perform the movement. Because you are only using one side of your body, you must keep tension in your core at the top of the swing to stay balanced. The one-handed swing is slightly more difficult because you're being challenged to control the entire movement with one side. As a result, it's best to start with a lighter weight and build up as you become more comfortable with the movement.

How to Do a Kettlebell Swing

A. Stand with feet shoulder-width apart and a kettlebell on the floor about a foot in front of toes. Hinging at the hips and keeping a neutral spine (no rounding your back), bend down and grab the kettlebell handle with both hands.

B. To initiate the swing, inhale and hike the kettlebell back and up between legs. (Your legs will slightly straighten in this position.

C. Powering through the hips, exhale and quickly stand up and swing the kettlebell forward up to eye level. At the top of the movement, the core and glutes should visibly contract.

D. Drive the kettlebell back down and up underneath you and repeat. When you're done, pause slightly at the bottom of the swing and place the kettlebell back on the ground in front of you.

Repeat for 30 seconds, then rest for 30 seconds. Try 5 sets. (Alternate swings with heavy kettlebell exercises for a killer workout.)

Kettlebell Swing Form Tips

Your arms should simply guide the kettlebell as it floats up during the first half of the swing. Don't use your arms to lift the bell.

At the top of the movement, your abdominal muscles and glutes should visibly contract. To help you do this, blow your breath out when the kettlebell reaches the top, which will create tension in your core.

Don't treat the swing like a squat: In a squat, you shoot your hips back and down as if you were sitting in a chair. To perform a kettlebell swing, think about pushing your butt back and hinging at the hips, and let your hips power the movement.

Read More
Katie Dixon